

Building your own synthetic ice rink might not be as complicated as you would expect. Millions of hockey players from around the world build and use their own ice skating rinks out of synthetic ice every day. If you are contemplating one of your own, we have good news for you.
A Little About Synthetic Ice
Synthetic ice has been around and in use since the early 1960s. A group of developers first had the idea of manufacturing artificial ice in the mid-1950s.
In the beginning stages of synthetic ice, things were not as smooth as they are today. One of the largest drawbacks of skating on old artificial ice is that it had to be constantly treated with a gliding agent that allowed the skaters to be able to somewhat glide across the flooring.
Any attempt to ice skate on this older style ice flooring without a lubricant would result in a skater having to struggle just to move a couple of feet or so. Imagine trying to ice skate on a surface such as a linoleum floor. That would be a similar equivalent.
In any event, there was no way that a person could install this kind of flooring into their own home and expect to be able to merely ice skate without a ton of issues.
As the years passed the knowledge of the developers steadily increased until they were able to formulate a fantastic polymer plastic-type flooring that had almost all of the bells and whistles that traditional ice has.
Traditional Ice Skating Rinks
The thing about traditional ice that scientists had such a hard time re-creating with plastic is that it has its own properties that are difficult to mimic in a plastic. While ice is merely frozen water, the way that skaters glide across the surface is almost angelic. The reason why skaters can breeze over the surface is that when the skates rub against the ice it causes enough friction to generate heat. With this heat comes a slight melting of the ice where the ice skates touch.
As the skates move forward across the surface of the ice, the fronts of the blades continually melt a small layer of ice for the remaining end of the blades to blissfully glide ahead as if floating on air. The water that the heat creates from the melted ice acts as a natural lubricant for the ice skates.
Thanks to the constant new discoveries that continue to surface with each passing day, modern-day science has been able to provide developers with a solution that allows lubricants and other conditioners to be infused with polymer plastics in order to produce a synthetic ice flooring that is much more similar to real ice than ever before.
Advanced technology and scientific discoveries are all major factors that made the possibility of having an ice rink in the comfort of home become a reality.
Before you Install Your Panels
Now that we have established a little history behind why you have the opportunity to have an ice skating rink in your home, it is time to get to work on your rink. The first thing that you will need to do before you install your panels is to decide where you want your ice rink to be.
It is most recommended to lay the panels on a hard, flat surface that is already established. If you have a concrete floor in your garage or back patio, or even in your home somewhere it is a great place to build.
If you want to build your rink on top of grass, on top of dirt, or on top of carpet the best thing to do is to get yourself some sheets of thick plywood and lay them down as a subflooring so that your panels will have a solid foundation to be on. If the foundation is not solid, you will run the risk of damaging the panels so be sure to build the rink where there is a good, solid flooring for the panels to sit.
Measuring Out the Area
One synthetic ice panel will be approximately two feet by four feet, which makes six square feet. Every four panels will fit nicely on a typical 4X8 feet sheet of plywood. The best way to figure out how many panels you will need is to measure the entire area that you will be building your rink on and get the square footage of that area. Once you figure out the square footage of the area, the length of the area in feet multiplied by the width of the area in feet will give you the total square footage of that area.
Since you already know that one panel is two feet by four feet totaling an area of 6 feet all you have to do is divide the number 6 into the area footage that you are planning to build on and you will know how many panels you need.
In most cases, there are a total of 4 panels per box of sheets. This way you can figure out how many boxes you need.
Laying out the Panels
The first thing you will want to do is make sure that the flooring area that you are installing the panels on is level and cleared of debris. If you are building on a subflooring, be careful to not cause the plywood that is on the floor to shift upwards and cause raises in the platform.
Once your flooring area is ready to go, you will want to put your first panels out in the middle of the floor, then work your way outward towards the outside of the rink.
The panels are rectangular in shape and have interlocking tabs around the edges. Place your first panel flat on the ground, then connect your second panel in place in a way that is appropriate for your layout.
You can start from the outside and work your way towards the center of the flooring area, but you may not be able to get the last panel to fit perfectly in place. Unless you have an exact and precise measurement it is highly recommended to work from the inside out. That way you will always have room to build outward if you need it.
Tamping Down the Flooring Area
With each panel that snaps into place, you should tamp the connecting areas down with a rubber mallet. Avoid hitting the edges too hard because if you damage them, you will never get them to lie flat unless you replace the damaged panels. Just a couple of light tamps with the mallet should snap the edges perfectly and snugly into place.
Go over the entire area with your eyes and the mallet to make sure that none of the edges are sticking up and that there are no dents or dips in the flooring. The panels are made so that there should be no seams to get in the way of the ice skates as they glide across the surface. Gaps, dips, and raises in the flooring tend to make ice skating difficult and even dangerous so take great care to address any blemishes that you discover when you check the surface.
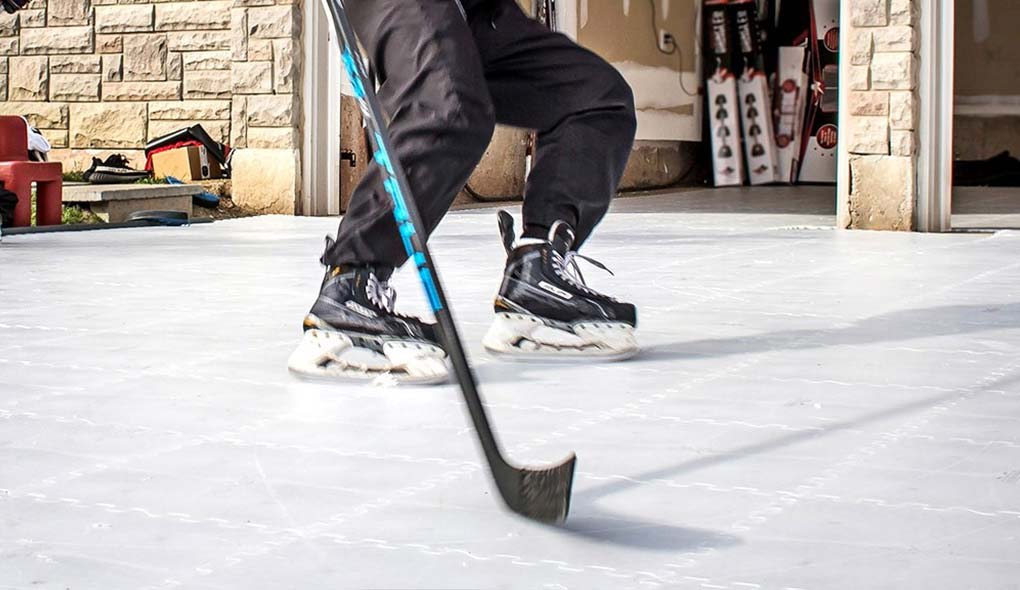
Skate on Your New Rink
When you are done checking the floor over for issues and are satisfied that there is no danger of ice skates catching on any surface issues, it is time to put those skates on and try out your new rink. At first, it may be a bit different than you are used to, but after a while of skating on the floor, you will find that it is a great way to ice skate and build strength as you do.
Congratulations, you now have an ice skating rink of your very own. Have fun and enjoy!


